Recommended Gear
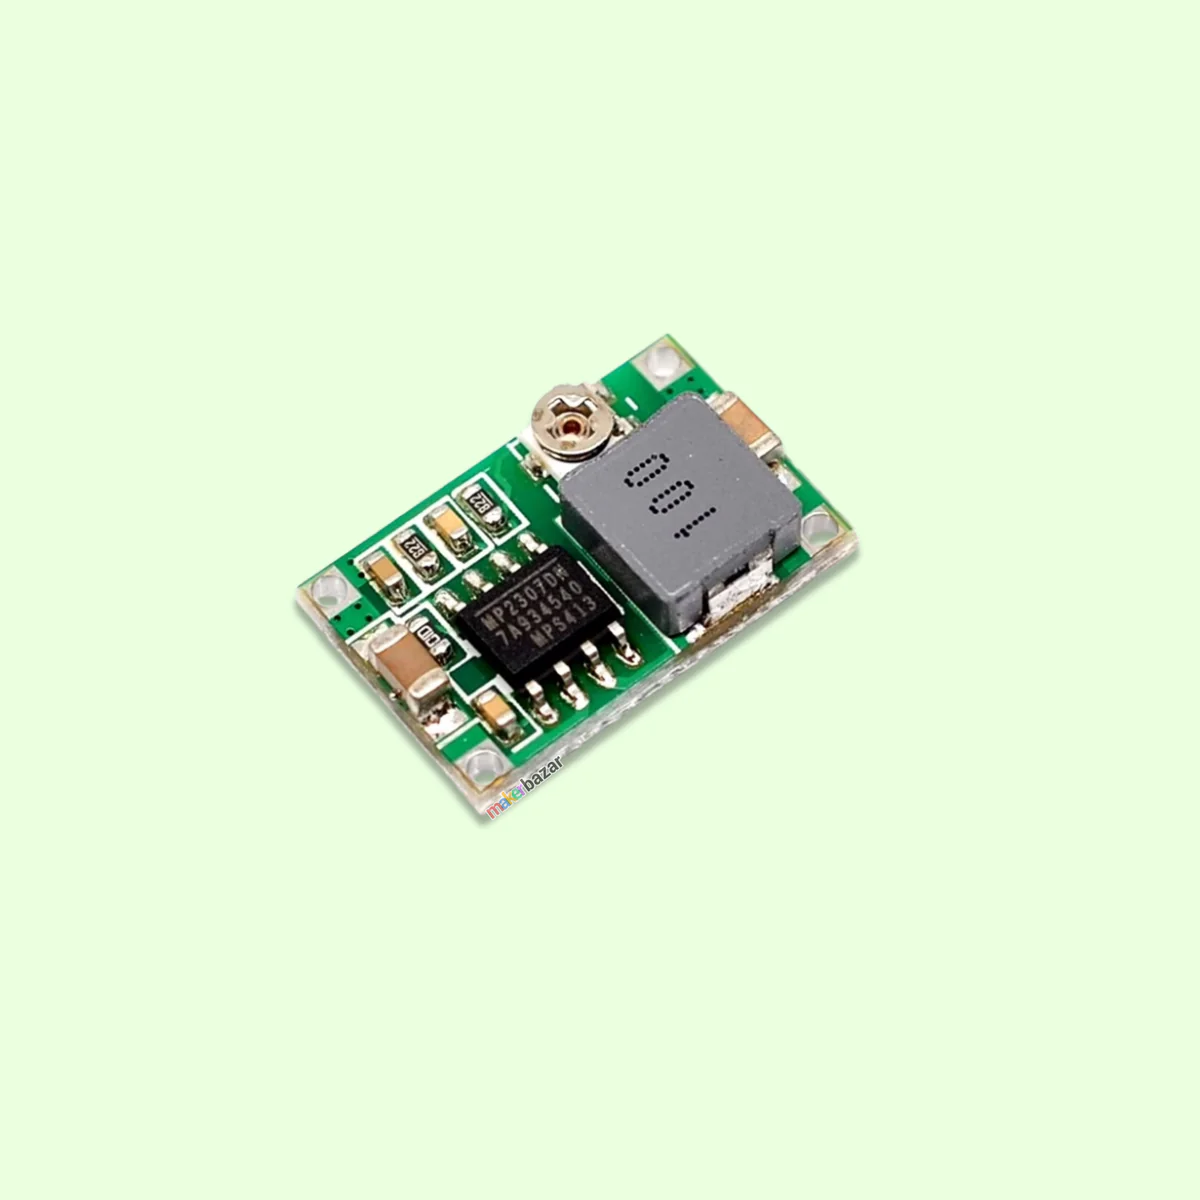
Mini360 Step-Down Buck Converter
An ultra-compact buck converter module for efficiently stepping down voltage — perfect for battery-powered projects and fitting inside tight enclosures.
Why It’s Awesome
The Mini360 is the smallest adjustable buck converter I’ve found that actually works well. Here’s why it’s in every project box:
- Tiny Form Factor — Just 17mm × 11mm. Fits inside almost any enclosure or tight PCB space.
- Wide Input Range — Accepts 4.75V to 23V input. Perfect for 12V, 9V, or multi-cell battery projects.
- Adjustable Output — 1.0V to 17V output via onboard potentiometer. Dial in any voltage you need.
- High Efficiency — Up to 96% efficiency. Minimal power loss means longer battery life.
- Decent Current — 1.8A continuous (3A peak). Enough for most microcontroller and sensor projects.
- Low Ripple — Clean output voltage with minimal noise. Safe for sensitive analog circuits.
- No External Components — Everything onboard. Just connect input, adjust voltage, and go.
- Synchronous Rectification — Uses MOSFETs instead of diodes. Higher efficiency and less heat.
- Incredibly Cheap — Around $0.50-1.00 USD per module. Stock up without guilt.
Technical Specs
| Feature | Specification |
|---|---|
| IC | LM2596 or compatible (MP2307/MP1584) |
| Input Voltage | 4.75-23V DC |
| Output Voltage | 1.0-17V DC (adjustable) |
| Output Current | 1.8A continuous, 3A peak |
| Switching Frequency | 1.5 MHz |
| Efficiency | Up to 96% |
| Operating Temperature | -40°C to +85°C |
| Dimensions | 17mm × 11mm × 3.8mm |
| Weight | ~1g |
| Typical Cost | USD 0.50-1.00 |
Perfect For
Battery-Powered Projects:
- Regulating LiPo/Li-Ion batteries (7.4V-12.6V) to 5V or 3.3V
- Powering microcontrollers from 9V batteries
- Efficient voltage regulation for portable devices
- Multi-cell NiMH battery projects
Embedded Systems:
- Arduino and ESP8266/ESP32 power supplies
- Raspberry Pi Zero power from 12V (step down to 5V)
- Sensor modules requiring precise voltage
- Low-power IoT nodes
Space-Constrained Builds:
- Inside small 3D-printed enclosures
- Wearable electronics
- Drone and RC projects
- Miniature robotics
Automotive Projects:
- 12V car power to 5V USB charging
- Dash cam power regulation
- Sensor and module power from vehicle battery
- Accessory power adapters
How to Use
Basic Setup:
- Connect input voltage (4.75-23V)
- Measure output voltage with multimeter
- Adjust potentiometer (tiny screw on top) until desired voltage is reached
- Connect load (keep current below 1.5A for best reliability)
Important Tips:
- Use a proper screwdriver — The adjustment pot is tiny. Use a precision screwdriver or ceramic tool.
- Measure first — Don’t guess. Use a multimeter to verify output voltage before connecting your circuit.
- Add capacitors — 100µF electrolytic on input and output improves stability, especially with long wires.
- Heat management — At high currents (>1A) or large voltage drops, add a small heatsink or thermal pad to the IC.
- Wire gauge — Use 22-24 AWG wire for currents up to 1.5A. Thicker wire for higher currents.
Common Applications
12V to 5V:
- Input: 12V wall adapter or car battery
- Output: Set to 5V
- Use case: Powering Arduino, Raspberry Pi, USB devices from 12V
3S LiPo (11.1V) to 5V:
- Input: 3-cell LiPo battery (11.1V nominal, 12.6V charged)
- Output: Set to 5V
- Use case: Powering electronics in RC projects, drones, portable devices
9V Battery to 3.3V:
- Input: 9V alkaline battery
- Output: Set to 3.3V
- Use case: Low-power sensors, ESP8266, wearable projects
Comparison to Alternatives
vs Linear Regulators (LM7805):
- ✅ Much higher efficiency (96% vs ~40%)
- ✅ Runs cooler, longer battery life
- ✅ Wider input voltage range
- ❌ Slightly more expensive ($0.50 vs $0.20)
vs Larger Buck Modules (LM2596 board):
- ✅ Much smaller size (1/4 the footprint)
- ✅ Higher switching frequency = smaller inductor
- ❌ Lower current capacity (1.8A vs 3A)
- ❌ Harder to adjust (tiny potentiometer)
Pro Tips
- Buy authentic modules — Some clones have lower-quality inductors that buzz or overheat. Stick to reputable sellers.
- Pre-adjust voltage — Set the correct output voltage before connecting your circuit. Easier to measure with no load.
- Potentiometer stabilization — After adjusting, apply a tiny drop of hot glue or nail polish to the pot screw to prevent drift.
- Reverse polarity protection — Add a diode (1N5819) in series with the input for extra safety.
Where to Buy
Available from:
- AliExpress (best prices, bulk packs of 10-20)
- eBay (various sellers)
- Amazon (faster shipping, singles or small packs)
- Banggood
Pro tip: Buy a pack of 10-20. At $0.50 each, it’s worth having extras on hand for prototyping and quick power supply needs.
Part of the FullyAutomatix recommended tools collection — gear that actually gets used in the workshop.